|
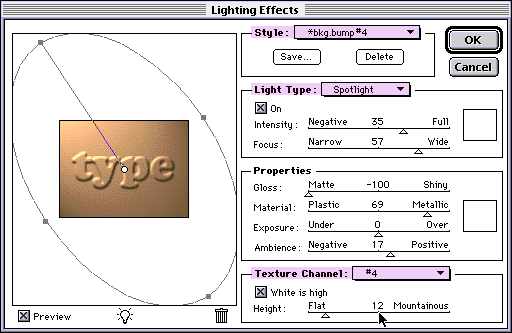
OK,
let's look at the window.
On
the left you're seeing a low-res thumbnail of what your
modifications are doing.
You'll
also notice the points at the outside of the ellipse,
as well as the white point in the center.
You
can click on these and move them around to alter your
light source.
Widen
it, and your image will get brighter.
Grab
the white spot in the middle and you can move the whole
light around.
Click
on the white square at the upper right, and you'll get
a menu to alter the color of the light source, and that
little dot will change to match.
If
it's taking too long to wait between modifications,
turn off the "Preview" button and make your modifications
first.
At
the top under "Style", you'll find a handful
of preset effects to use.
You
can also save your own settings when you find one you
like.
This
on is "*bkg.bump#4", a custom setting of my own.
Next
is "Light Type", in this case a spotlight.
You can adjust the brightness and spread here,
or choose other types of lighting.
There
are dozens to choose from, but you'll probably want
to choose one and use it exclusively throughout a site,
so that everything will have a cohesive look.
Make
sure you decide where your light source is coming from,
I generally choose top/left.
After
this is "Properties".
The
first 2 options affect the material itself, NOT the
lighting.
Shiny+Plastic
will give you an effect like shiny metal (no,
it's not logical, but that's how it is).
These
are the 2 options you'll probably spend the most time
tweaking.
The
next 2 refer to photographic aspects of how the image
is processed.
Use
these if your image is turning out too dark or light.
You
can "over" or "under" expose the film
(sic) or raise and lower the ambient lighting.
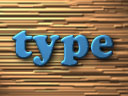
The
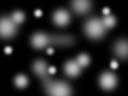
last section is the most fun. "Texture Channel"
allows us to specify an image that will warp the surface
of the image.
Combined
with our lighting effects, we're going to get
some interesting 3D effects!
The
default setting is "none".
You
can specify one of the RGB channels, or a saved
channel of your own.
If
you choose a value for your "Height" that's *too*
high, you'll get some rather strange artifacts creeping
into your edges. Generally you'll never go over 50 units.
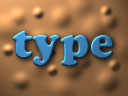
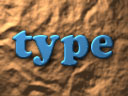
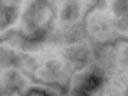
Here's
some examples, which I'll describe as I go along...
|